Raspberry PI powered Face Follower Webcam

Hi everybody, here’s my new Raspberry PI project: the face follower webcam!

When I received my first raspberry, I understood it would have been very funny to play with real world things: so i tried to make the PI react with environment, and I played a lot with speech recognition, various kind of sensors and so on. But then I suddenly realized that the real funny thing would have been to make it see. I also understood that real-time processing a webcam input would be a tough task for a device with those tiny resources.

Now i discovered that this is a tough task, but the raspberry can achieve it, as long as we keep things simple.


OpenCV Libraries

As soon as I started playing with webcams, I decided to look for existing libraries to parse the webcam input and to extract some information from it. I soon came across the OpenCV libraries, beautiful libraries to process images from the webcam with a lot of features (which I didn’t fully explore yet), such as face detection.

I started trying to understand if it was possible to make them work on the PI, and yes, someone had already done that, with python too, and it was as easy as a

sudo apt-get install python-opencv

After some tries, i found out that the pi was slow in processing the frames to detect faces, but only because it buffered the frames and I soon had a workaround for that.. and soon I was done: face detection on raspberry PI!

All you need to try face detection on your own is the python-opencv package and the pattern xml file haarcascade_frontalface_alt.xml, i guess you can find it easily in the Internet.

I started with a script found here and then I modified it for my purposes.

The Project

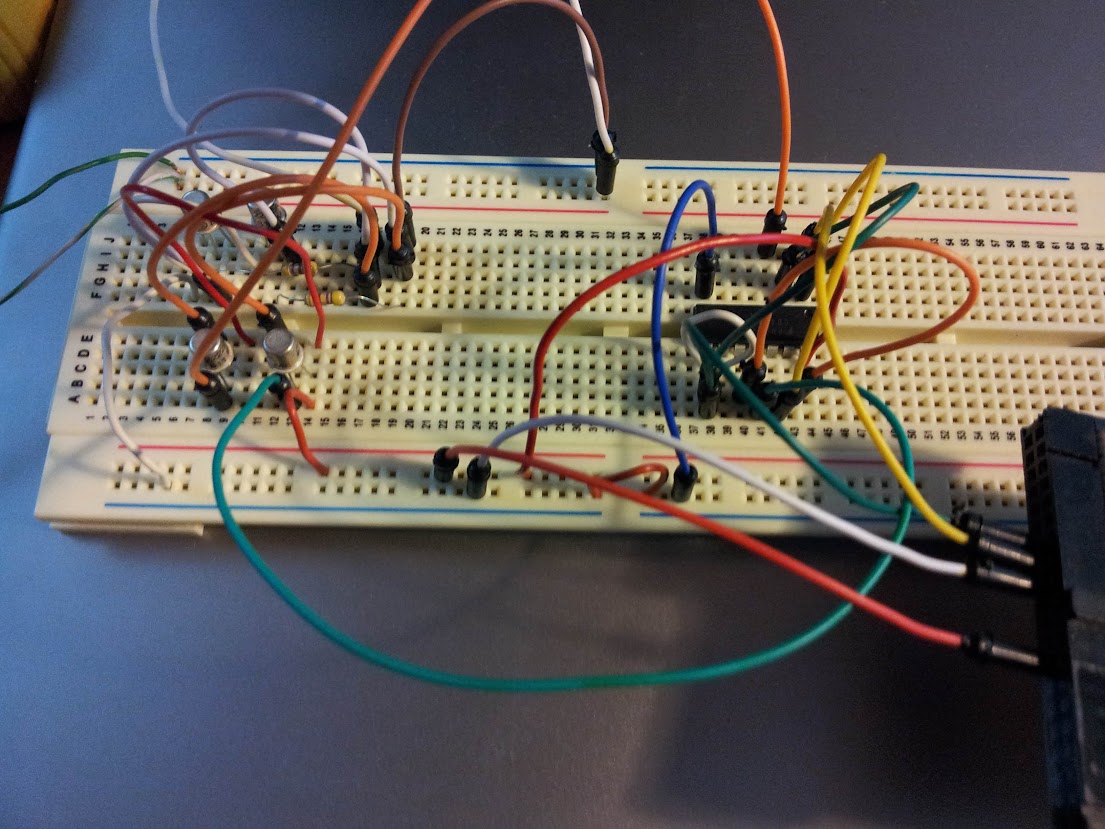
Eventually, I decided to build with my PI a motor driven webcam which could “follow” a face detected by opencv in the webcam stream. I disassembled a lot of things before finding a suitable motor but then I managed to connect it to the Raspberry GPIO (I had to play a little with electronics here, because i didn’t have a servo motor — if you need some information about this part, i’ll be happy to provide it, but i’m not so good with electronics thus the only thing I can say is that it works). Here’s a picture of the circuit:
The circuit to control the motor from the PI.

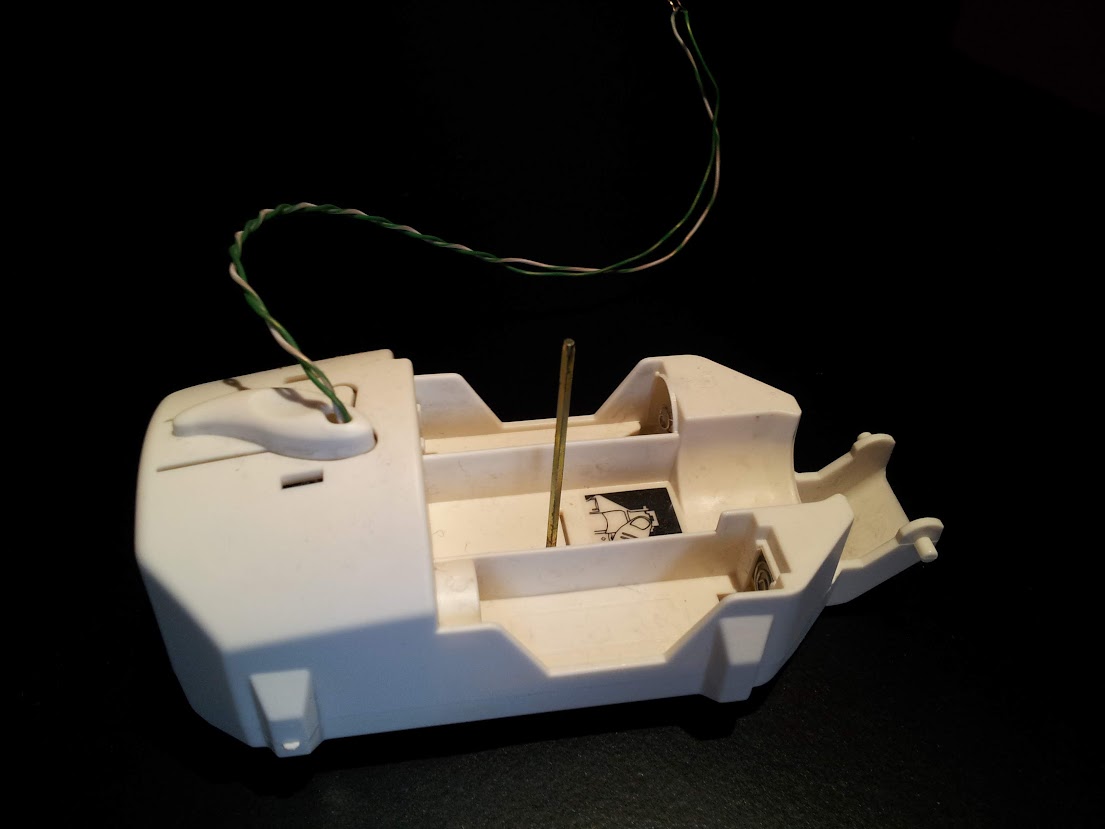
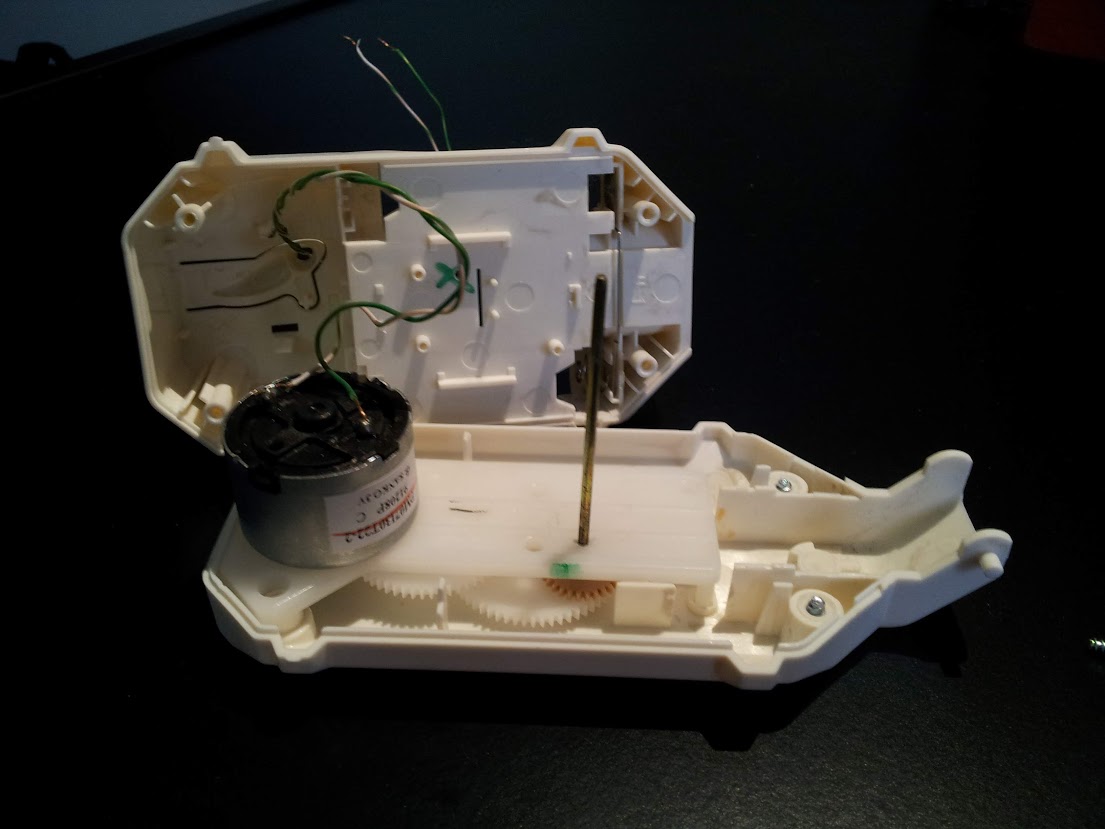
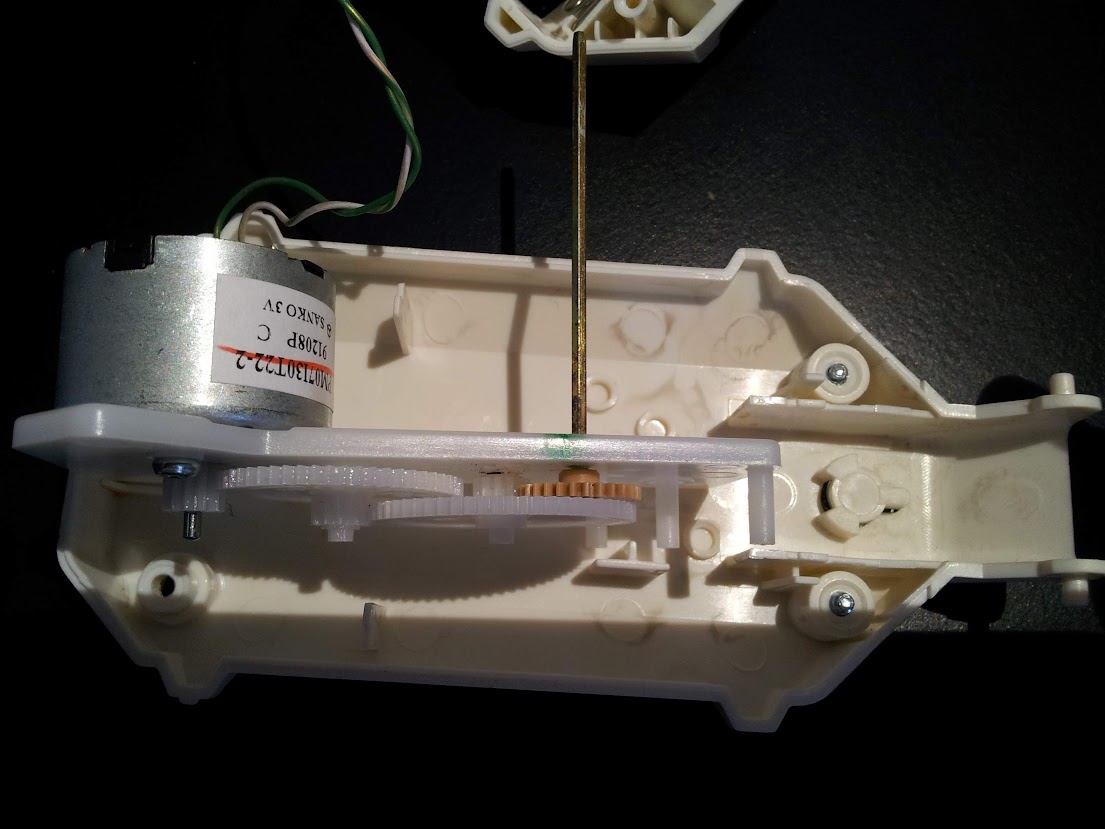
And here are some photos of the motor, to which I mounted an additional gear wheel.

The circuit to control the motor from the PI.

The circuit to control the motor from the PI.

The circuit to control the motor from the PI.

Once the motor worked, I attached it to a webcam which i plugged into the PI, and then I joined the previous linked script with some GPIO scripting to achieve the goal, here is the result:

import RPi.GPIO as GPIO
import time,sys
import cv,os
from datetime import datetime
import Image

#GPIO pins i used
OUT0 = 11
OUT1 = 13

out0 = False #!enable line: when it's false, the motor turns, when it's true, it stops 
out1 = False #!the direction the motor turns (clockwise or counter clockwise, it depends on the circuit you made)

def DetectFace(image, faceCascade):

    min_size = (20,20)
    image_scale = 2
    haar_scale = 1.1
    min_neighbors = 3
    haar_flags = 0

    # Allocate the temporary images
    grayscale = cv.CreateImage((image.width, image.height), 8, 1)
    smallImage = cv.CreateImage(
            (
                cv.Round(image.width / image_scale),
                cv.Round(image.height / image_scale)
            ), 8 ,1)

    # Convert color input image to grayscale
    cv.CvtColor(image, grayscale, cv.CV_BGR2GRAY)

    # Scale input image for faster processing
    cv.Resize(grayscale, smallImage, cv.CV_INTER_LINEAR)

    # Equalize the histogram
    cv.EqualizeHist(smallImage, smallImage)

    # Detect the faces
    faces = cv.HaarDetectObjects(
            smallImage, faceCascade, cv.CreateMemStorage(0),
            haar_scale, min_neighbors, haar_flags, min_size
        )

    # If faces are found
    if faces:
        #os.system("espeak -v it salve")
        for ((x, y, w, h), n) in faces:
            return (image_scale*(x+w/2.0)/image.width, image_scale*(y+h/2.0)/image.height)
            # the input to cv.HaarDetectObjects was resized, so scale the
            # bounding box of each face and convert it to two CvPoints
            pt1 = (int(x * image_scale), int(y * image_scale))
            pt2 = (int((x + w) * image_scale), int((y + h) * image_scale))
            cv.Rectangle(image, pt1, pt2, cv.RGB(255, 0, 0), 5, 8, 0)

    return False

def now():
    return str(datetime.now());

def init():
    GPIO.setmode(GPIO.BOARD)
    GPIO.setup(OUT0, GPIO.OUT)
    GPIO.setup(OUT1, GPIO.OUT)
    stop()

def stop(): #stops the motor and return when it's stopped
    global out0
    if out0 == False: #sleep only if it was moving
        out0 = True
        GPIO.output(OUT0,out0)
        time.sleep(1)
    else:        
        out0 = True
        GPIO.output(OUT0,out0)

def go(side, t): #turns the motor towards side, for t seconds
    print "Turning: side: " +str(side) + " time: " +str(t)
    global out0
    global out1

    out1 = side
    GPIO.output(OUT1,out1)
    out0 = False
    GPIO.output(OUT0,out0)
    time.sleep(t)
    stop()

#getting camera number arg
cam = 0
if len(sys.argv) == 2:
    cam = sys.argv[1]

#init motor
init()

capture = cv.CaptureFromCAM(int(cam))
#i had to take the resolution down to 480x320 becuase the pi gave me errors with the default (higher) resolution of the webcam
cv.SetCaptureProperty(capture, cv.CV_CAP_PROP_FRAME_WIDTH, 480)
cv.SetCaptureProperty(capture, cv.CV_CAP_PROP_FRAME_HEIGHT, 320)
#capture = cv.CaptureFromFile("test.avi")

#faceCascade = cv.Load("haarcascades/haarcascade_frontalface_default.xml")
#faceCascade = cv.Load("haarcascades/haarcascade_frontalface_alt2.xml")
faceCascade = cv.Load("/usr/share/opencv/haarcascades/haarcascade_frontalface_alt.xml")
#faceCascade = cv.Load("haarcascades/haarcascade_frontalface_alt_tree.xml")

while (cv.WaitKey(500)==-1):
    print now() + ": Capturing image.."
    for i in range(5):
        cv.QueryFrame(capture) #this is the workaround to avoid frame buffering

    img = cv.QueryFrame(capture)
    hasFaces = DetectFace(img, faceCascade)
    if hasFaces == False:
        print now() + ": Face not detected."
    else:
        print now() + ": " + str(hasFaces)
        val = abs(0.5-hasFaces[0])/0.5 * 0.3
        #print "moving for " + str(val) + " secs"
        go(hasFaces[0] < 0.5, val)
    #cv.ShowImage("face detection test", image)


Of course I had to play with timing to make the webcam turn well, and the timings like everything strictly connected to the motor depends on your specific motor and/or circuit.

Here’s the video (in italian):

Embedding Google+ Videos in your Web Page

UPDATE: This method works but the embedded video expires after about a month, and the code must be updated. It might be possible to try to modify the embedded code to make it expire later, but I didn’t test it.

With the introduction of Google+ instant upload, many people started automatically backing up their photos and videos in Google Plus (and many started actively using G+ for this reason).

This is of course great, but there’s also a limitation: you can share the uploaded photos/videos only in Google Plus. I think it works this way to increase the popularity of the social network but that’s not very comfortable, expecially when you have ~300Mb videos already uploaded but you can’t even move them to Youtube, to share and embed them where you do prefer (eg. facebook, twitter, personal website).

I searched the Internet a lot before understanding that probably Google doesn’t want you to share Google Plus videos outside its social network, and i decided to “manually” find a way.
After a little trying i found out how to to embed Google+ videos in your personal website. I found that you can easily extract the html code to embed the video directly from G+:

The steps are few and pretty easy (i assume you use Chrome/Chromium browser because it is very comfortable for inspecting the DOM, but it can certainly be done in Firefox too):

  1. Go to Google Plus, find the video you want to embed and simply play it.
  2. When the video is playing, pause it and inspect the html (you can do this with chrome/chromium browsers by right-clicking -> Inspect Element). Be sure to right click near the video, but not on it (you can’t, it’s flash content) gplusinspect
  3. Search the DOM tree for the “<embed>” tag (See the picture)codezoom
  4. Then right click on it -> Copy as HTML (on Chrome/Chromium)
  5. Now you have an HTML code representing the video: we’re almost done! It should look like this:

<object style=”width: 1280px; height: 758px;” width=”1280″ height=”758″ classid=”clsid:d27cdb6e-ae6d-11cf-96b8-444553540000″ codebase=”http://download.macromedia.com/pub/shockwave/cabs/flash/swflash.cab#version=6,0,40,0″ bgcolor=”#fff”><param name=”src” value=”//www.youtube.com/get_player?enablejsapi=1&amp;cc_load_policy=2″ /><param name=”allowfullscreen” value=”true” /><param name=”allowscriptaccess” value=”always” /><param name=”scale” value=”noScale” /><param name=”wmode” value=”opaque” /><param name=”flashvars” value=”fmt_list=22%2F1280x720%2F9%2F0%2F115%2C35%2F854x480%2F9%2F0%2F115%2C34%2F640x360%2F9%2F0%2F115%2C5%2F426x240%2F7%2F0%2F0&amp;fmt_stream_map=22%7Chttp%3A%2F%2Fredirector.googlevideo.com%2Fvideoplayback%3Fid%3D10af9fef8ab88134%26itag%3D22%26source%3Dpicasa%26cmo%3Dsensitive_content%3Dyes%26ip%3D0.0.0.0%26ipbits%3D0%26expire%3D1363183661%26sparams%3Did%252Citag%252Csource%252Cip%252Cipbits%252Cexpire%26signature%3D8477241CE149151477AC7B259B31E65C94DBCA32.B804A52B1EDAD148A6DFDC7B417E3A922CC0B2CF%26key%3Dlh1%2C35%7Chttp%3A%2F%2Fredirector.googlevideo.com%2Fvideoplayback%3Fid%3D10af9fef8ab88134%26itag%3D35%26source%3Dpicasa%26cmo%3Dsensitive_content%3Dyes%26ip%3D0.0.0.0%26ipbits%3D0%26expire%3D1363183661%26sparams%3Did%252Citag%252Csource%252Cip%252Cipbits%252Cexpire%26signature%3DB6AFABA155F7C5294D346C9EF74763382E0A9A3A.7B6B5451FA3051A6A28AFB37C923501CA93FEE8C%26key%3Dlh1%2C34%7Chttp%3A%2F%2Fredirector.googlevideo.com%2Fvideoplayback%3Fid%3D10af9fef8ab88134%26itag%3D34%26source%3Dpicasa%26cmo%3Dsensitive_content%3Dyes%26ip%3D0.0.0.0%26ipbits%3D0%26expire%3D1363183661%26sparams%3Did%252Citag%252Csource%252Cip%252Cipbits%252Cexpire%26signature%3DCCA2684867495F12648E4B0D52504D7330BBDFFB.A93A0E1B7C81630C878E1E8B8AE6EC1330008D67%26key%3Dlh1%2C5%7Chttp%3A%2F%2Fredirector.googlevideo.com%2Fvideoplayback%3Fid%3D10af9fef8ab88134%26itag%3D5%26source%3Dpicasa%26cmo%3Dsensitive_content%3Dyes%26ip%3D0.0.0.0%26ipbits%3D0%26expire%3D1363183661%26sparams%3Did%252Citag%252Csource%252Cip%252Cipbits%252Cexpire%26signature%3D1DADD9325E60ABC22DDC8FE45B84E89AC03BCB89.223CC73A0690DFD6584BF8BEFBA379135311CD94%26key%3Dlh1&amp;video_id=picasacid&amp;fs=1&amp;hl=it&amp;autoplay=1&amp;ps=picasaweb&amp;playerapiid=uniquePlayerId&amp;t=1&amp;vq=large&amp;auth_timeout=86400000000&amp;ttsurl=https://plus.google.com/_/photos/timedtext/100072144891672956015/5841126284110989458?&amp;ttspolicyfile=https://plus.google.com/_/photos/timedtext/crossdomain.xml” /><embed style=”width: 1280px; height: 758px;” width=”1280″ height=”758″ type=”application/x-shockwave-flash” src=”//www.youtube.com/get_player?enablejsapi=1&amp;cc_load_policy=2″ allowfullscreen=”true” allowscriptaccess=”always” scale=”noScale” wmode=”opaque” flashvars=”fmt_list=22%2F1280x720%2F9%2F0%2F115%2C35%2F854x480%2F9%2F0%2F115%2C34%2F640x360%2F9%2F0%2F115%2C5%2F426x240%2F7%2F0%2F0&amp;fmt_stream_map=22%7Chttp%3A%2F%2Fredirector.googlevideo.com%2Fvideoplayback%3Fid%3D10af9fef8ab88134%26itag%3D22%26source%3Dpicasa%26cmo%3Dsensitive_content%3Dyes%26ip%3D0.0.0.0%26ipbits%3D0%26expire%3D1363183661%26sparams%3Did%252Citag%252Csource%252Cip%252Cipbits%252Cexpire%26signature%3D8477241CE149151477AC7B259B31E65C94DBCA32.B804A52B1EDAD148A6DFDC7B417E3A922CC0B2CF%26key%3Dlh1%2C35%7Chttp%3A%2F%2Fredirector.googlevideo.com%2Fvideoplayback%3Fid%3D10af9fef8ab88134%26itag%3D35%26source%3Dpicasa%26cmo%3Dsensitive_content%3Dyes%26ip%3D0.0.0.0%26ipbits%3D0%26expire%3D1363183661%26sparams%3Did%252Citag%252Csource%252Cip%252Cipbits%252Cexpire%26signature%3DB6AFABA155F7C5294D346C9EF74763382E0A9A3A.7B6B5451FA3051A6A28AFB37C923501CA93FEE8C%26key%3Dlh1%2C34%7Chttp%3A%2F%2Fredirector.googlevideo.com%2Fvideoplayback%3Fid%3D10af9fef8ab88134%26itag%3D34%26source%3Dpicasa%26cmo%3Dsensitive_content%3Dyes%26ip%3D0.0.0.0%26ipbits%3D0%26expire%3D1363183661%26sparams%3Did%252Citag%252Csource%252Cip%252Cipbits%252Cexpire%26signature%3DCCA2684867495F12648E4B0D52504D7330BBDFFB.A93A0E1B7C81630C878E1E8B8AE6EC1330008D67%26key%3Dlh1%2C5%7Chttp%3A%2F%2Fredirector.googlevideo.com%2Fvideoplayback%3Fid%3D10af9fef8ab88134%26itag%3D5%26source%3Dpicasa%26cmo%3Dsensitive_content%3Dyes%26ip%3D0.0.0.0%26ipbits%3D0%26expire%3D1363183661%26sparams%3Did%252Citag%252Csource%252Cip%252Cipbits%252Cexpire%26signature%3D1DADD9325E60ABC22DDC8FE45B84E89AC03BCB89.223CC73A0690DFD6584BF8BEFBA379135311CD94%26key%3Dlh1&amp;video_id=picasacid&amp;fs=1&amp;hl=it&amp;autoplay=1&amp;ps=picasaweb&amp;playerapiid=uniquePlayerId&amp;t=1&amp;vq=large&amp;auth_timeout=86400000000&amp;ttsurl=https://plus.google.com/_/photos/timedtext/100072144891672956015/5841126284110989458?&amp;ttspolicyfile=https://plus.google.com/_/photos/timedtext/crossdomain.xml” bgcolor=”#fff” /></object>

Now you can (if needed) modify some parameter you find in the code, i recommend to change the
autoplay=1
to prevent the video from autostarting when the page loads.

This is not a official way to share Google Plus videos, of course, so this method may not work in the future, or the videos may someday disappear. But so far, it has worked for me.

Blog

Questo è un posto di prova. Ho pensato che visto che anche chi non ha nulla da dire tiene un blog, anch’io avrei potuto farlo. Non sono tanto sicuro che sia vero però.